
Handyman’s Toolbox: 35+ DIY Solutions To Tackle Common Household Issues
Welcome to the whimsical world of homeownership! As you embark on this grand adventure, rest assured that the occasional mishap or repair is simply part of the journey. Whether you face a leaky faucet, a squeaky door, or a mischievous loose cabinet handle, fret not! These pesky household problems may try to dampen your spirits, but fear not, for we have the perfect solutions using everyday items you already have at home.
Say goodbye to gunk and grime with homemade washing machine cleaner. And if you’re tired of those slippery carpet situations, fear not! We’ve got a nifty little trick involving a simple glue grip to keep them firmly in place.
Whether you’re a seasoned DIY enthusiast or just starting to dip your toes into the world of fixer-upper fun, these delightful DIY solutions will empower you to conquer these challenges. So, buckle up and get ready to transform your home into a problem-solving paradise!
1. Pool noodle stopper
Unleash the hidden potential of your pool noodles and let them shine beyond the summer days! Wave goodbye to the annoyance of your vanished socks and small items taking refuge in that pesky gap between the washing machine and the wall.
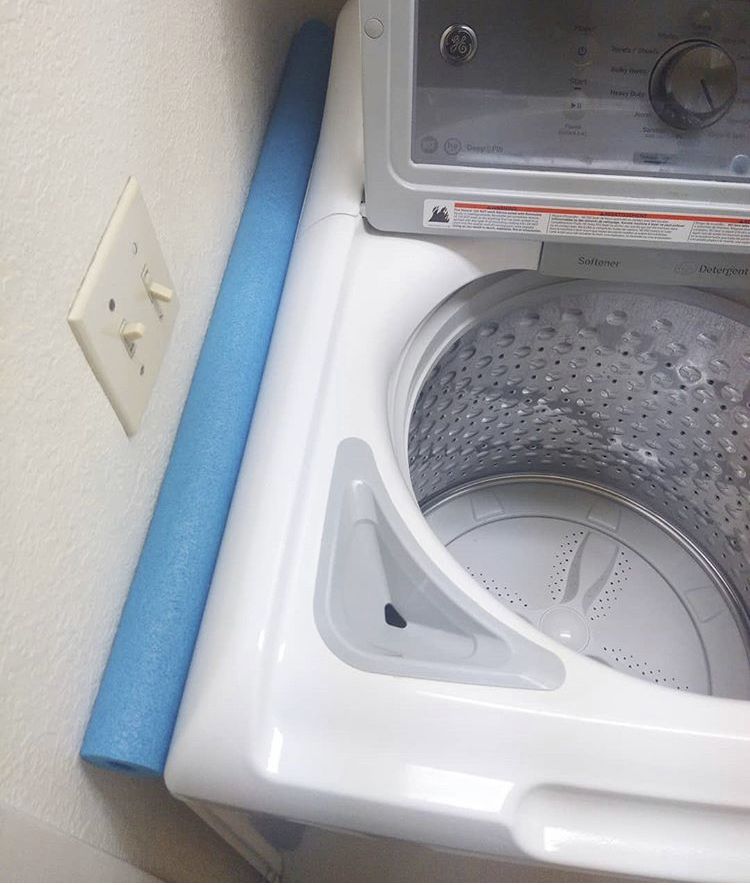
Just slide the noodle into that pesky gap and watch the magic unfold. Suddenly, your clothes and tiny treasures are trapped in their cozy haven, unable to escape. Not only does this nifty trick keep your walls free from unsightly marks, but it also saves you from accidental collisions and bumps.
2. Removing wood scratches
Welcome to the world of magnificent wood furniture! It brings a cozy elegance to any space, but alas, scratches sometimes sneak in to spoil the fun. But worry not, friends! Nature has bestowed upon us a humble hero: the walnut. Yes, you heard it right! Nature’s own remedy for wood imperfections.
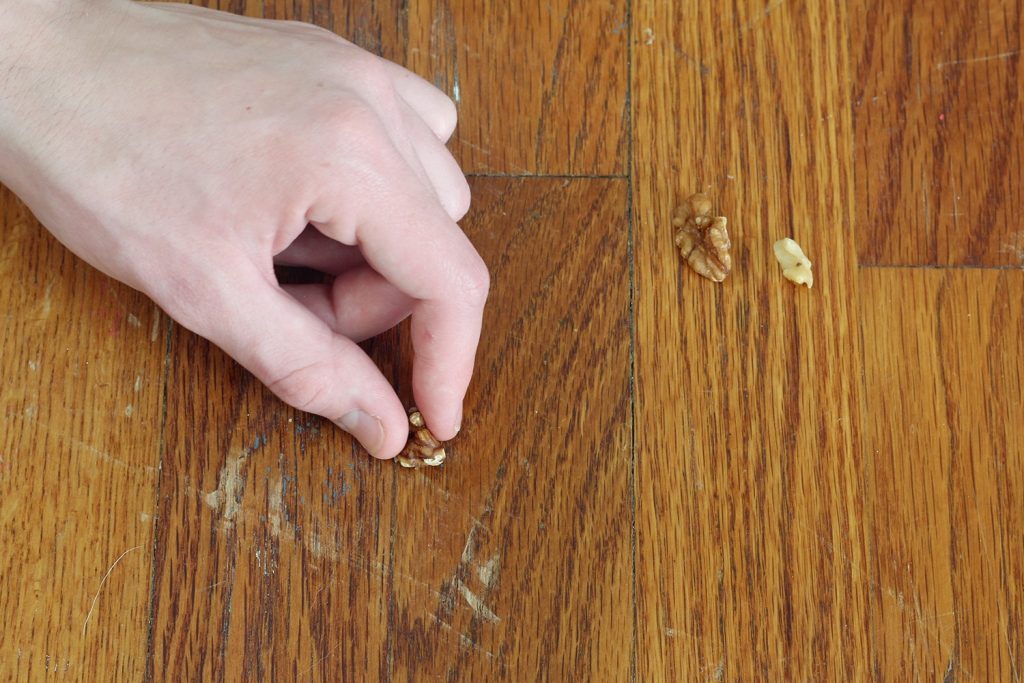
Gently rub the walnut over the scratches. Then, with gentle strokes of your fingertips, distribute the walnut’s healing properties. To complete this restorative process, buff the area with a soft cloth, leaving your floors flawless again. Embrace the beauty of this natural fix and bid farewell to those pesky scratches!
3. Tin can planter
Explore your blossoming passion for gardening and enhance your indoor foliage with this delightful Tin Can Planter technique. To convert a tin can into a planter, thoroughly clean and peel off any can labels. Then, meticulously create multiple drainage holes on the bottom of the can using a nail and hammer.
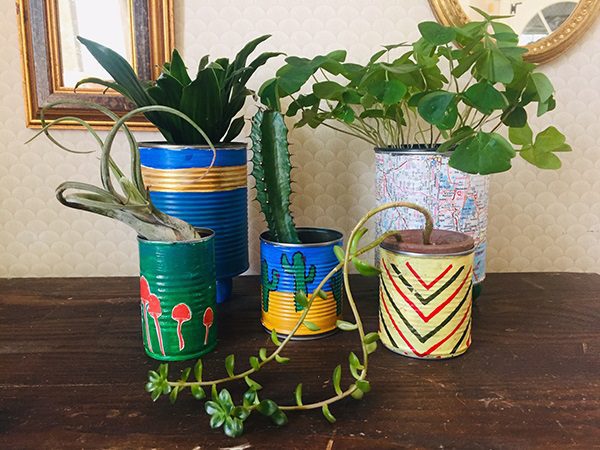
Before adding soil to your planter, place empty soda cans at the bottom. These humble cans, filled with air, play a vital role in maintaining optimal soil moisture and aeration. With this ingenious technique, your plants will receive the perfect balance of hydration and oxygen, promoting their growth and vitality.
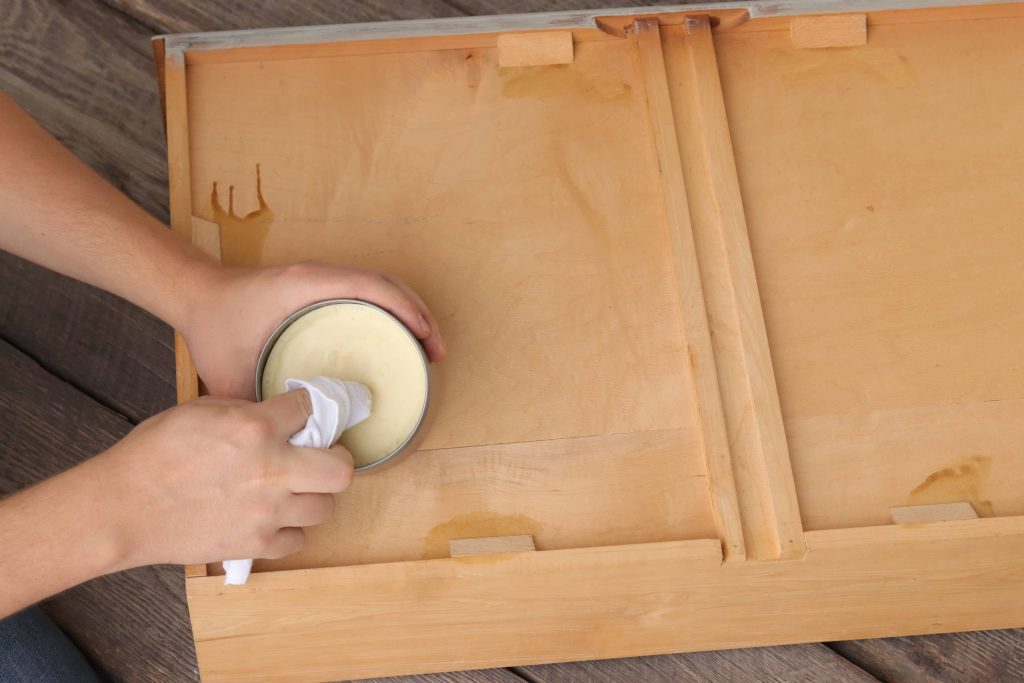
4. Baking soda cleaner
Discover the hidden powers of baking soda, an incredibly versatile ingredient that extends beyond the kitchen. Embrace the marvels of this household item by integrating it into your cleaning regimen. When it comes to rejuvenating your furniture, baking soda emerges as an undeniable hero.
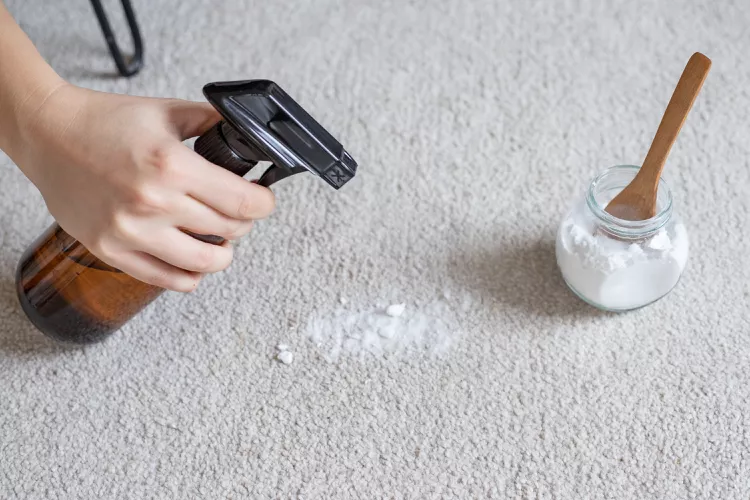
Generously sprinkle baking soda over the cushions and witness its enchanting effect. This natural cleansing agent adeptly absorbs odors and aids in lifting away dirt and grime. After letting it work its magic for a while, vacuum up the baking soda, unveiling a revitalized and welcoming couch.
5. Reopening sealed windows
There’s a DIY solution that can help you enjoy fresh air and natural light if your windows are sealed. With a little patience and care, you can reopen those windows and restore their functionality. To begin, gently place a chisel between the window and the frame in the sealed area.
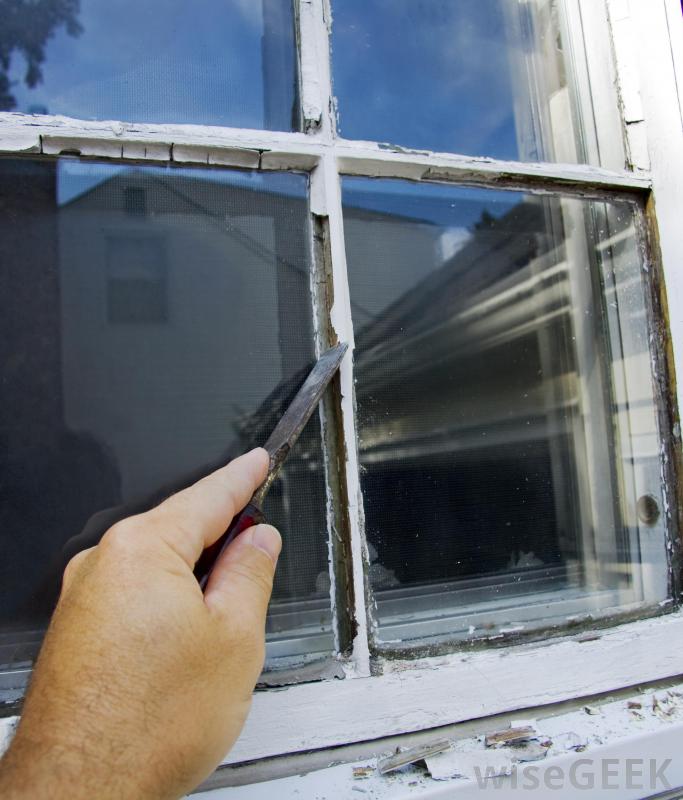
Employ a hammer to gently tap the chisel, aiming to eliminate the paint causing the window to adhere. Exercise caution by exerting light pressure and progressing slowly to prevent any harm to the window or frame. Once the paint has been cleared away, you will effortlessly be able to open your windows.
6. Keep your trash can fresh
Regularly empty and clean your trash can to prevent the buildup of dirt, residue, and unpleasant odors. Clean your trash can thoroughly using warm soapy water or vinegar and water solution. Scrub the interior and exterior surfaces of the trash can. Once you’ve scrubbed away the dirt and grime, rinse the trash can thoroughly and allow it to dry.
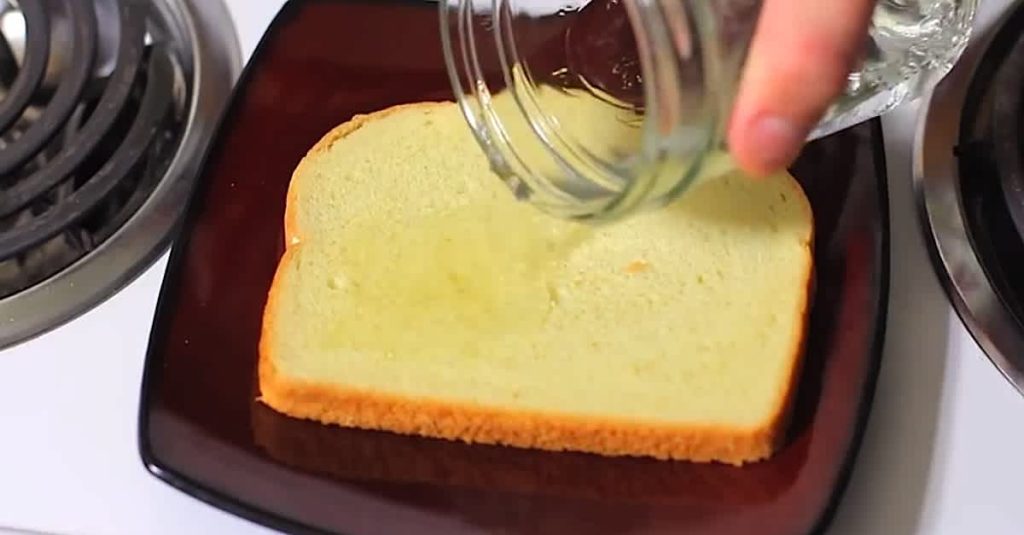
Start by soaking a slice of bread in vinegar until it absorbs the vinegar completely. Then, place the vinegar-soaked bread on a paper towel at the bottom of your empty garbage can. Leave it overnight for optimal results, allowing it to eliminate any odors, and it will be fresh in the morning.
7. Cleaning wooden cutting boards
Discover the secret to properly cleaning your wooden cutting board, and bid farewell to lingering stains and odors. Unbeknownst to many, the hidden crevices and contours of these boards can harbor bacteria and trapped food particles. The steps to cleaning the cutting board are easy to follow.

Sprinkle a generous amount of coarse salt over the board, and harness the power of half a lemon with a touch of magic. As you gently rub the salt into every crevice, the lemon’s disinfecting properties work their wonders, leaving your cutting board pristine and revitalized.
8. Cleaning screws in vinegar
Vinegar, known for its acidic properties, is a natural cleaning agent and rust remover. To begin, remove the screws from their current location and place them in a container or bowl. To remove rust from screws, create a vinegar bath by submerging the screws and tightly sealing the container to prevent oxygen from entering.
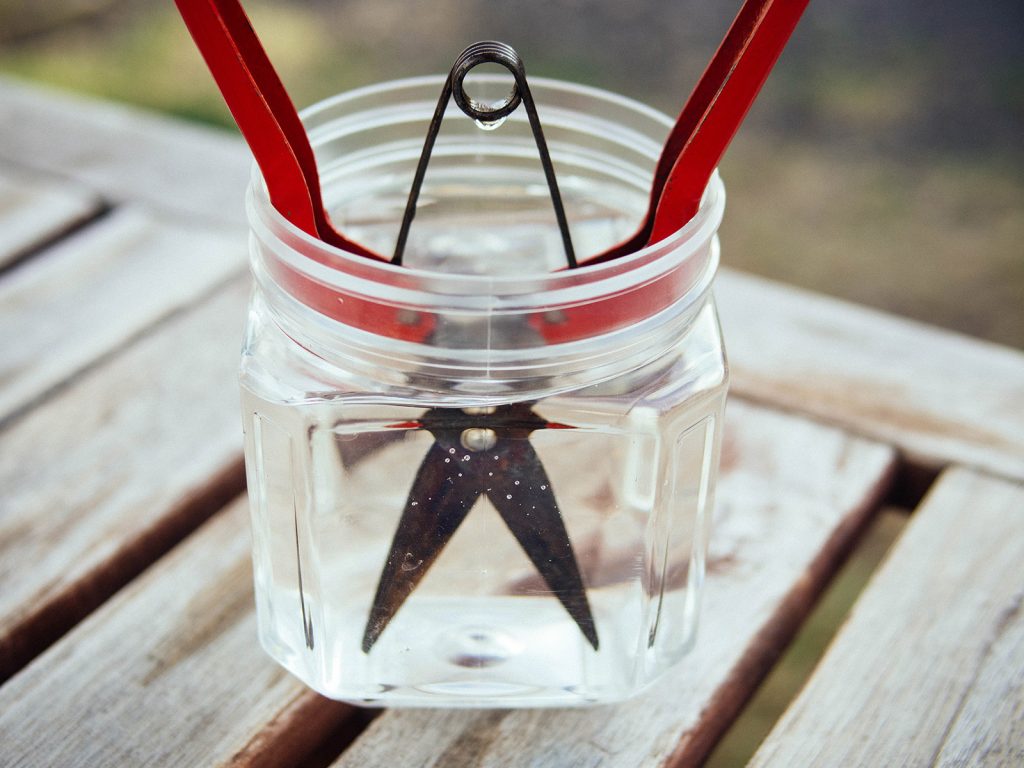
Let the screws soak in the vinegar for around 24 hours, occasionally shaking the container to help dislodge the rust. The acidic properties of vinegar work effectively to dissolve the rust, making it easier to clean and restore the screws.
9. Olive oil on hinges
Using a pipette or a small dropper, carefully apply some olive oil to the hinges. The oil acts as a natural lubricant, ensuring smooth and quiet movement. Not only will your doors open effortlessly, but you’ll also bid farewell to those annoying creaks.
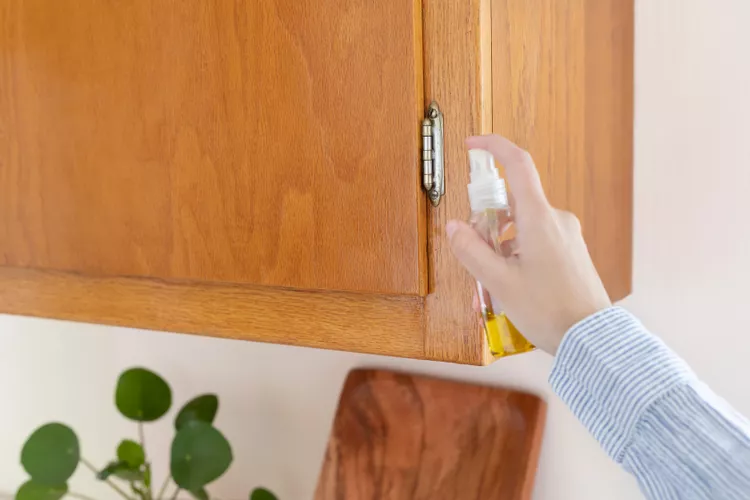
This everyday kitchen staple is an excellent lubricant for hinges, maintaining your hinges and enjoying quiet, friction-free operation throughout your home. Olive oil is not only a staple in the kitchen but also a handy tool for fixing common household problems.
10. Soda tabs as picture hooks
Transform your broken picture frames or create a stunning gallery wall with a simple soda tab hack! Those small tabs from soda cans can come in handy for various purposes, and now they can be your secret weapon for hanging up your favorite artwork!
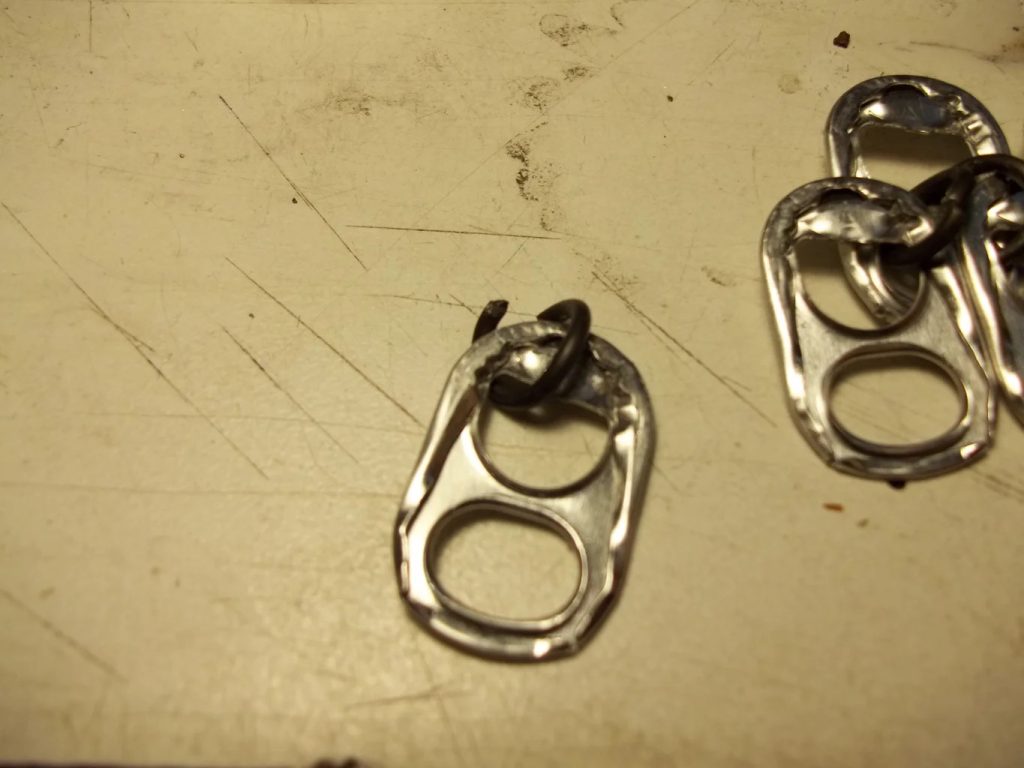
To get started, grab a screw and a soda tab. Attach the bottom half of the tab to the back of your picture frame using a drill. Then, use the top half of the tab to hang the frame on a hook or nail easily.
11. Fixing tear in screen door
When a tear emerges on our screen doors, replacing the entire screen can be a costly endeavor. However, there’s a simple and inexpensive solution to mend the tear—clear nail polish. Nail polish acts as a temporary adhesive, effectively sealing small tears. Start by cleaning the torn area and ensuring it is dry.
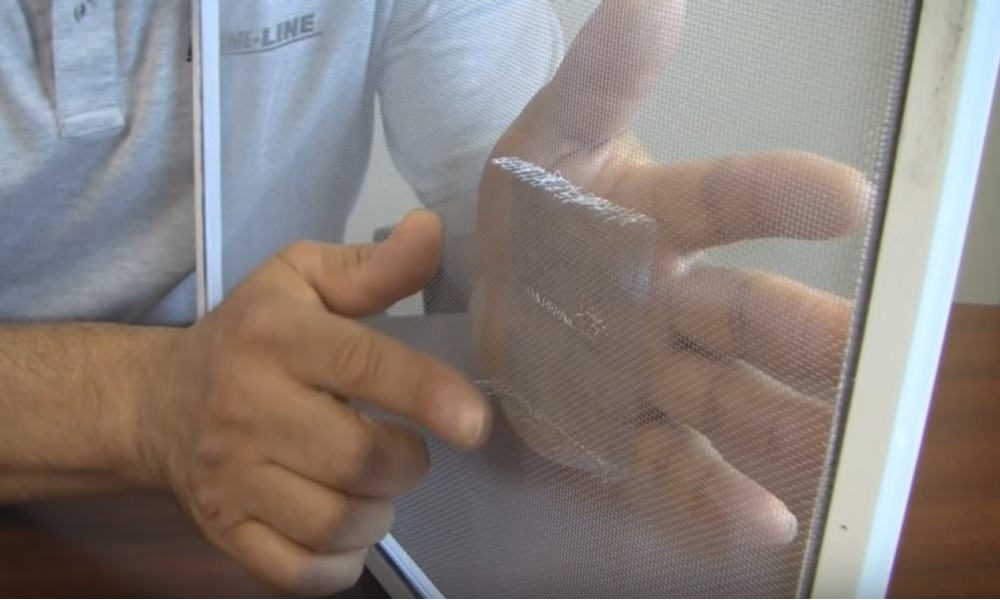
Apply a few drops of the polish directly onto the tear, allowing it to spread and create a protective seal. The clear nail polish acts as an invisible adhesive, restoring the functionality of your screen door without compromising its appearance. Now, enjoy the fresh air and keep unwanted pests out.
12. Liquid electrical tape on exposed wires
Don’t allow exposed wires to ruin your charging experience or pose a safety risk! Instead of purchasing a new phone charger and spending money, you can effortlessly repair frayed and exposed wires using liquid electrical tape. Simply cover the exposed portion with the tape to resolve the issue.
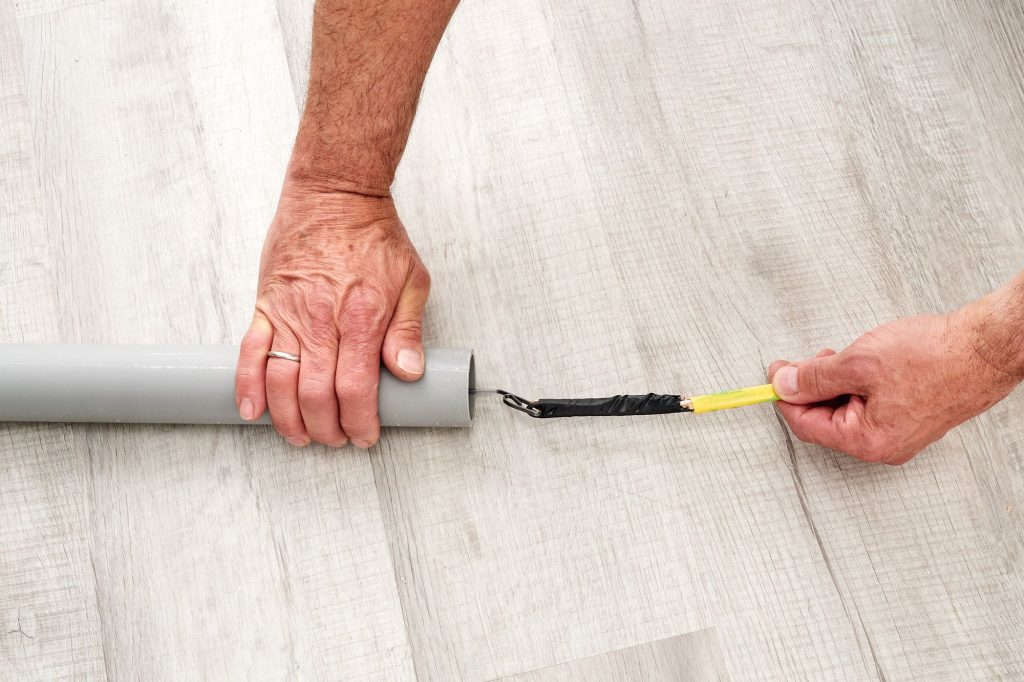
Liquid electrical tape is a handy product that dries to create a protective coating around the exposed wires, keeping you and your family safe from potential accidents. It’s particularly effective in filling in smaller rips or tears in the wire, providing a more secure and durable solution compared to using sticky tape.
13. Removing crayons from the walls
Discovering colorful crayon artwork on your walls, courtesy of your creative little ones, doesn’t have to induce panic! Instead of immediately turning to repainting or endless scrubbing, you can rely on WD-40. To effectively eliminate those artistic creations, simply spray a moderate amount of WD-40 directly onto the crayon marks.
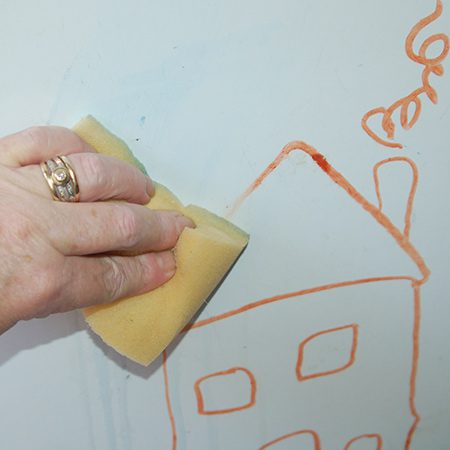
Allow the WD-40 to sit for a few minutes, allowing it to work its magic. Then, gently wipe away the crayon marks from the wall using a clean rag. You’ll be astonished at how effortlessly the marks vanish. Remember that WD-40 can be a valuable tool for addressing unwanted crayon masterpieces.
14. Glue grip on carpets
Loose or curled carpet edges can be a tripping hazard and detract from the overall appearance of a room. To address this common issue, a handy DIY solution involves using glue to secure the carpet grip or tack strip back in place.
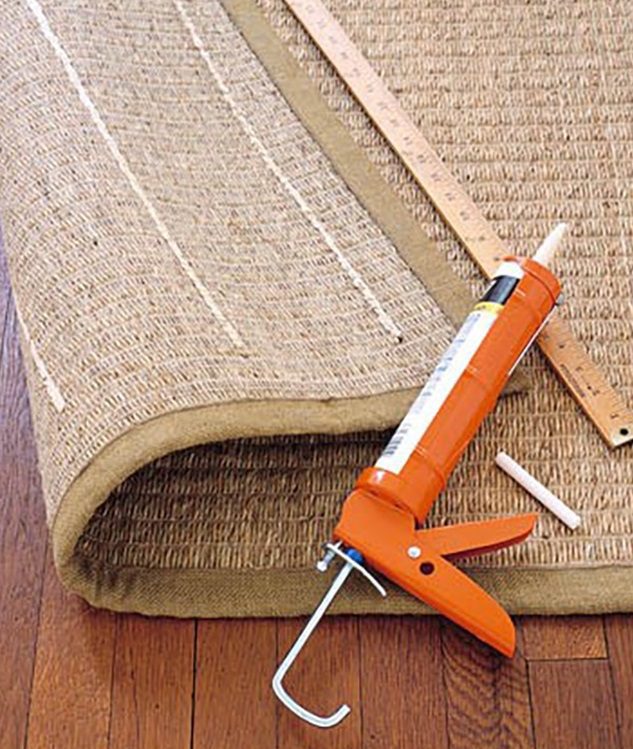
To begin, flip your carpet or rug upside down. Utilize a hot glue gun to form squiggles or straight glue lines along the underside. Once the glue has solidified, these adhesive lines will serve as reliable grips, effectively anchoring your carpet in place and minimizing the chances of slips and falls.
15. Vaseline to fix hinges
Say goodbye to those annoying squeaky doors with petroleum jelly, also known as Vaseline. If you’ve tried various lubricants without success, give Vaseline a go. Simply apply a little bit to the hinges, and voila! The creaking noise will be a thing of the past, and your house will feel less haunted.
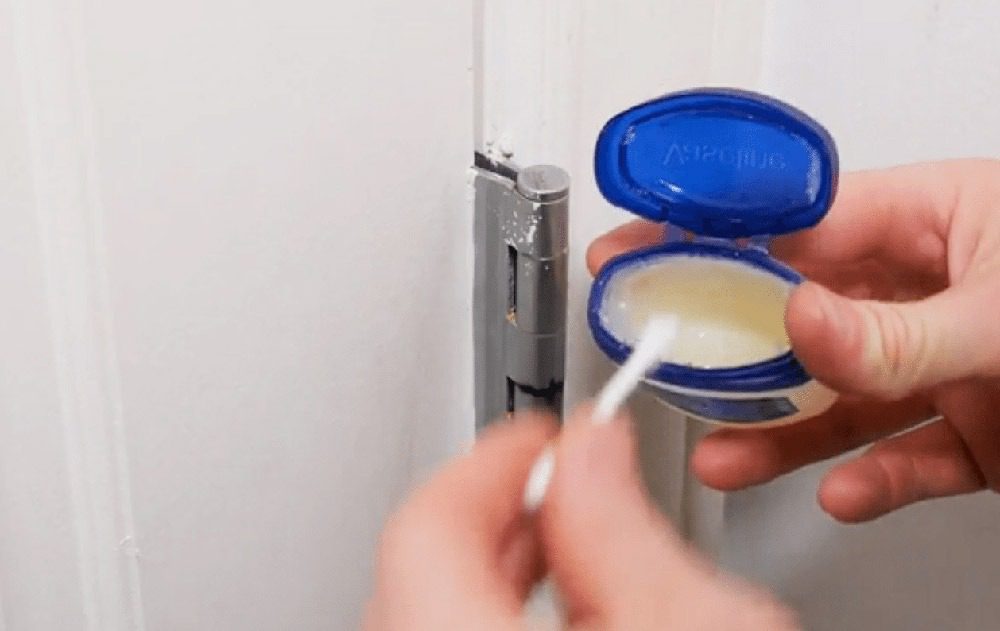
What sets petroleum jelly apart is its ability to penetrate the hinges and provide long-lasting lubrication. Unlike other oils or lubricants, it has a thick and adhesive texture, ensuring it stays in place and keeps your doors squeak-free. Try this DIY fix, and enjoy the silence and smooth operation of your doors!
16. DIY washing machine cleaner
It’s a common oversight that many people realize only when it’s too late – regular cleaning of the inside of your washing machine is essential. If neglected, the accumulated dirt in your washer can become trapped in the rubber seals around the door or within the pipes.
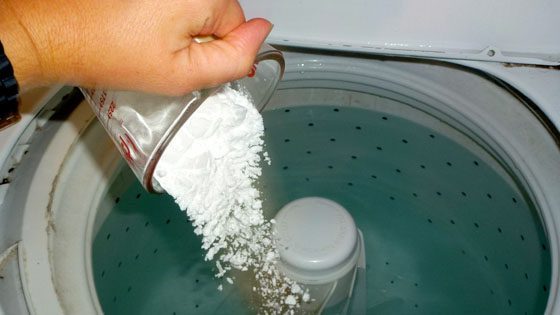
You probably won’t need to embark on a wild ingredient hunt for this one—simply raid your cupboards! Start by dumping two cups of baking soda into your empty washing machine and set it for a long, hot water cycle. Once that’s done, unleash the power of two cups of white vinegar and a sprinkle of 10 drops of essential oil.
17. Doors that open by themselves
If you’re dealing with doors that tend to swing open or close on their own, the solution might be simpler than you think. Loose or misaligned hinge pins are often the culprit, but fixing them is a straightforward DIY task!
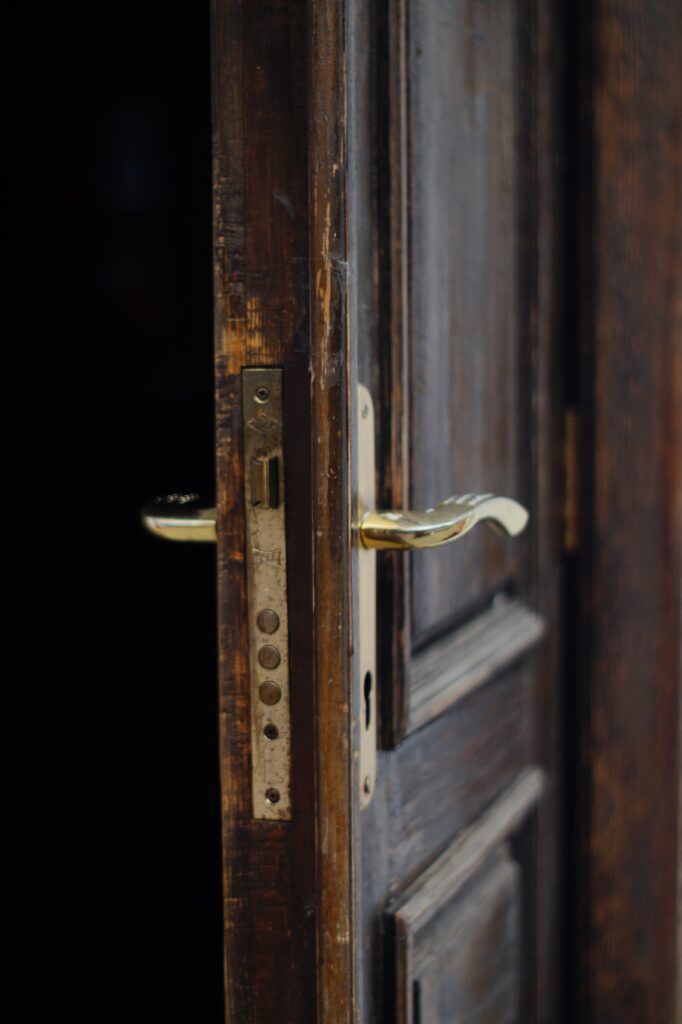
Begin by removing the hinge pins and placing them on a sturdy surface. Use a hammer to gently strike the center of each pin to straighten it out. Once the pins are straightened, reinsert them into the hinges and put the door back in its proper position. Just like that, your stability will be restored.
18. Toilet chain twisted
If your toilet seems to have a perpetual case of the runs, the likely suspect is a twisted toilet chain. This misalignment can disrupt the flapper seat, resulting in an unending water flow. But fear not! You don’t have to break the bank on a new toilet set or summon a plumber.
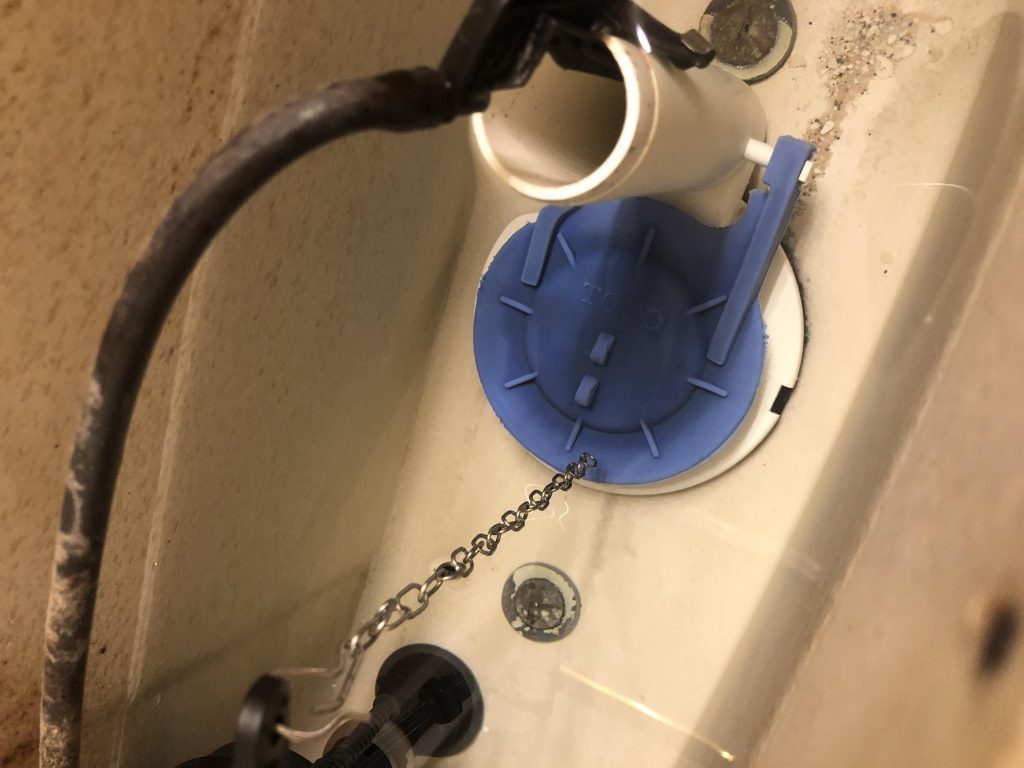
To fix the issue, remove the twisted chain. Then, grab a straw from your kitchen and slide it over the chain. Reattach the chain, ensuring it is straight and properly aligned. This is how you can untwist the chain and restore proper functioning to your toilet, saving you both time and money.
19. Using graphite in locks
Grab a spare pencil and sharpen the tip using a sharp knife. This will provide you with a source of graphite, which can act as a lubricant for your lock. Unlike oil, graphite particles are fine and won’t risk clogging the lock mechanism.
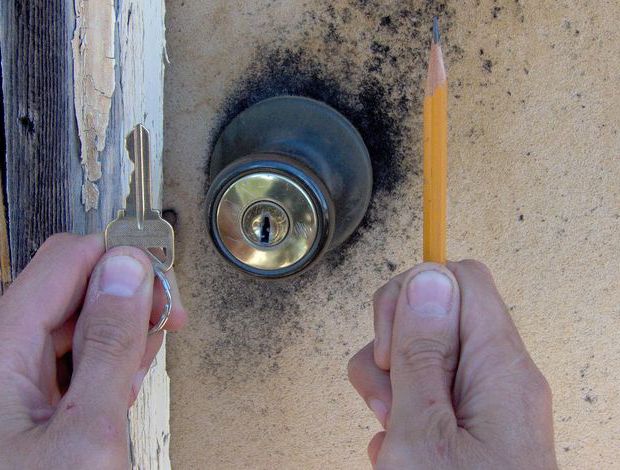
All you need to do is apply graphite to your key and gently insert it into the lock. The graphite is a friction-reducing agent, ensuring your key moves effortlessly in and out of the lock. Make sure to sharpen the pencil beforehand to avoid any potential issues with lead getting stuck in the lock mechanism.
20. Filling nail holes with crayon
If you’re renting a place and want to avoid potential charges from nail holes in the walls, there’s a hack that involves crayons. No need to hassle with filling the hole or finding the right paint color to hide the nail holes.
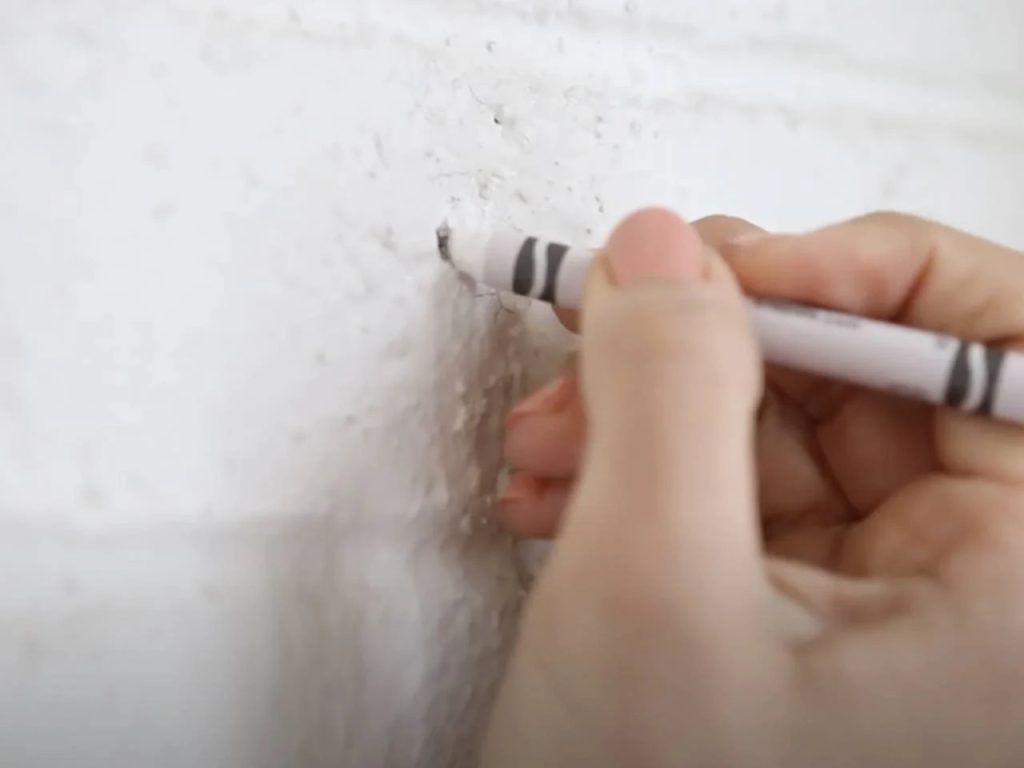
Select a crayon that closely matches the wall color. Start by coloring over the nail hole, ensuring you cover it completely. Then, use your fingers to rub the crayon into the hole. Your fingers will produce heat that will melt the wax, allowing it to blend seamlessly with the wall.
21. Vegetable peeler toolkit
The humble vegetable peeler, typically found in the kitchen, can surprisingly come to the rescue in various DIY situations around the house. Its versatility extends beyond peeling vegetables and can be a helpful tool for completing unexpected tasks.
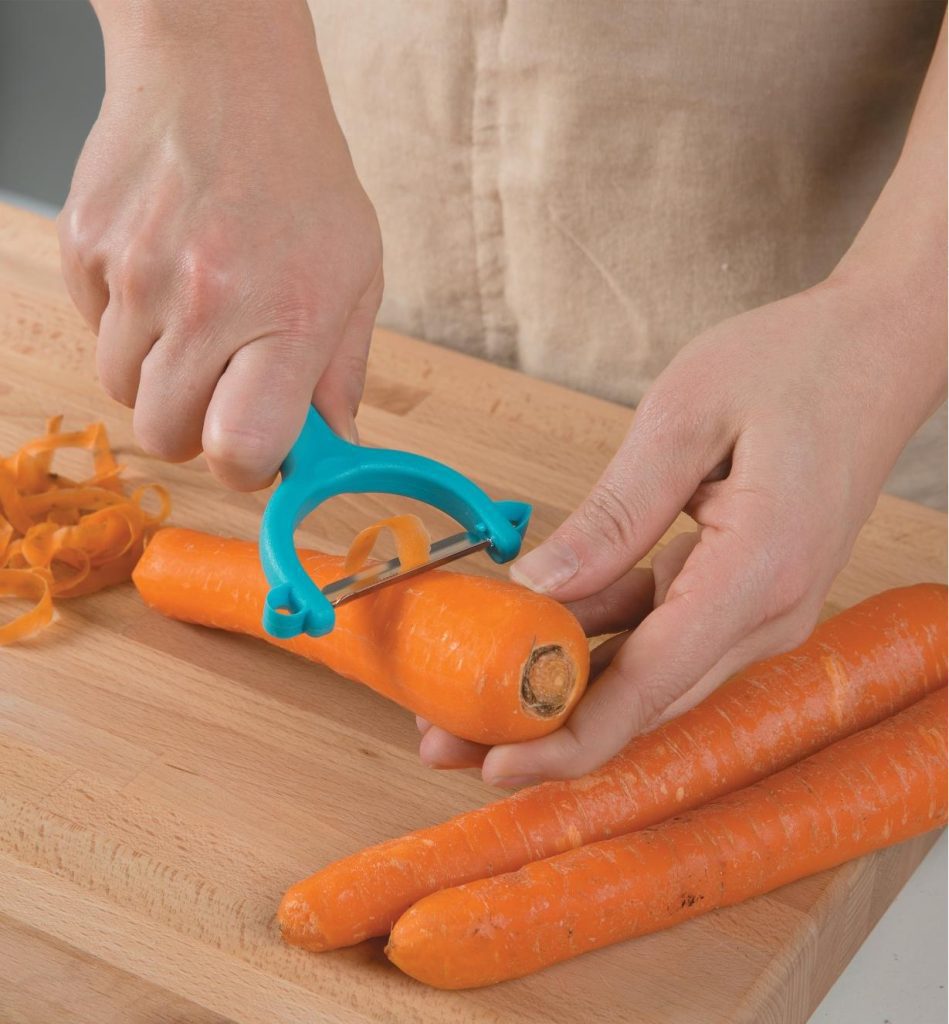
When faced with screws that don’t quite match your screwdriver, the tip of a vegetable peeler can save the day. The sturdy and tapered edge of the peeler provides enough grip to securely fasten the screws, eliminating the need for a trip to the store.
22. Scuffed floors
Scuffed floors can be quite the eyesore, but fret not! All you need is a tennis ball and a mop or broom handle. Attach the tennis ball securely to the end of the handle, and you’re good to go! The tennis ball’s soft texture is an abrasive, making it ideal for removing scuff marks.
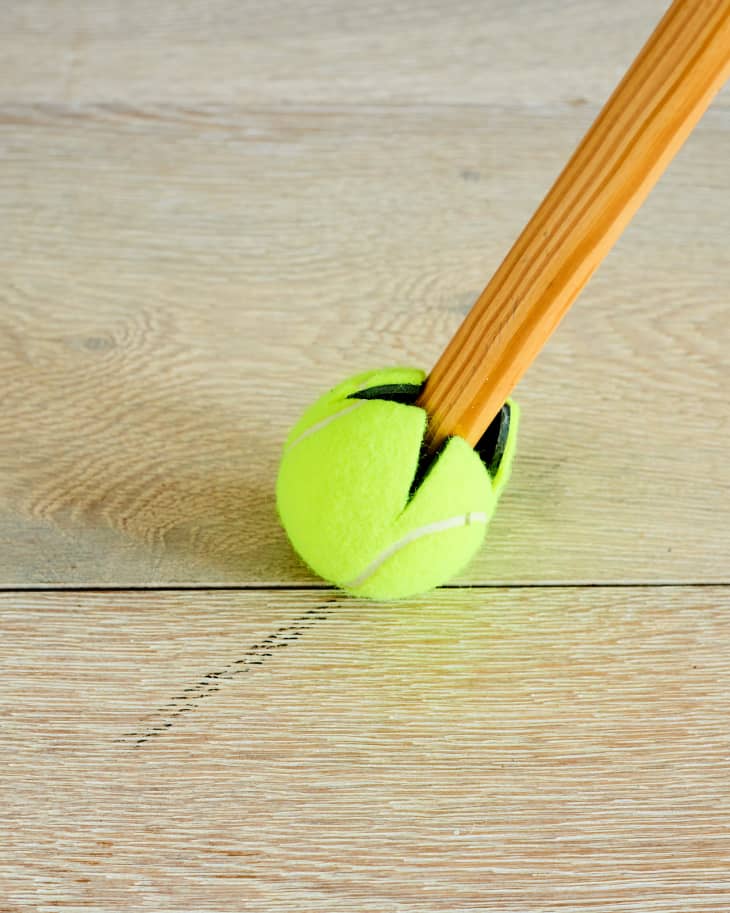
The ball will effectively pick up rubber marks and scuffs from the floor surface. Attaching it to a stick gives you better control over the pressure and direction as you buff out the scuffs, ensuring a precise and thorough cleaning.
23. Cleaning grout to perfection
Cleaning grout can be daunting, but there are alternatives to buying expensive grout cleaners. Why not make your homemade grout cleaner using essential ingredients in your pantry? It’s a cost-effective and practical solution that can keep your grout fresh and clean.
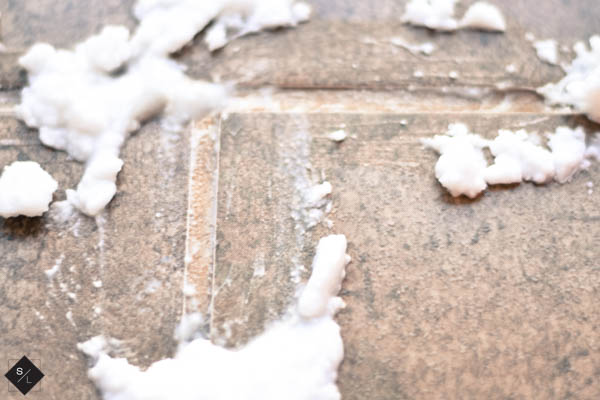
To make your grout cleaner, combine the bicarbonate of soda and water to form a paste. With an old toothbrush, scrub the grout lines using the paste. Then, spritz vinegar onto the bicarbonate paste, causing it to bubble and react. Rinse the area thoroughly to reveal beautifully clean grout.
24. Stop creaky stairs
Who would have thought talcum powder could work wonders in DIY projects? Among its many uses, one of the quirkiest involves those troublesome floorboards. By generously sprinkling talcum powder over them, you can bid farewell to the need for expensive repair services.
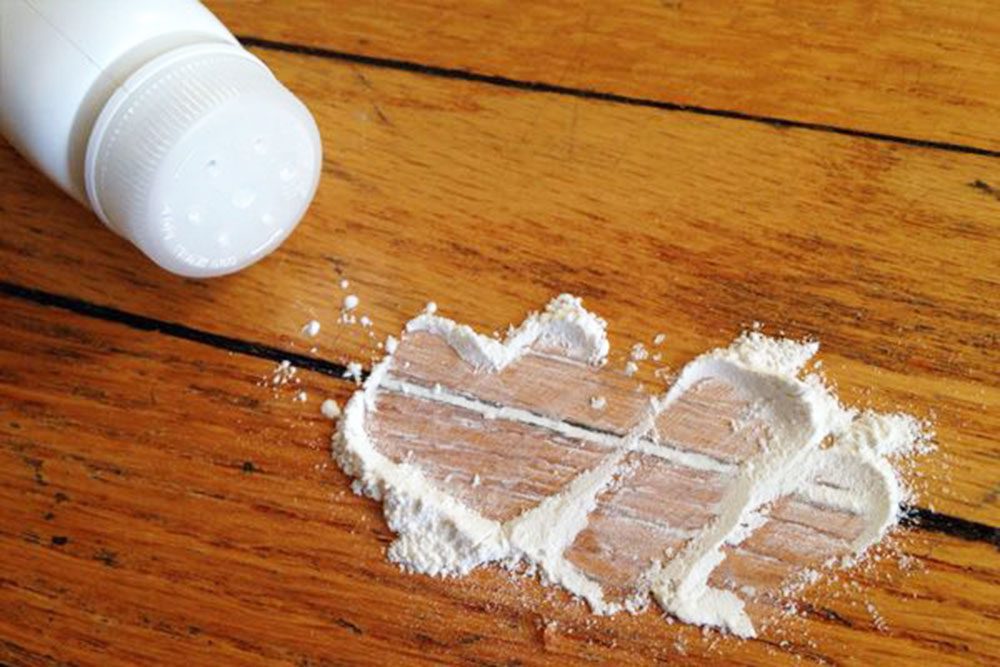
It’s not limited to stairs; this technique works wonders on any creaky floorboard throughout your house. Say goodbye to unwanted noise disturbances that might bother your downstairs neighbors. Remember to apply a generous amount of the solution and ensure it is thoroughly rubbed in for optimal results.
25. Getting rid of water stains
Water stains on the ceiling can be unsightly and require proper treatment before applying a fresh coat of paint. Instead of simply covering them up, it’s essential to address the underlying issue to prevent future stains from appearing. For hard surfaces, you can create a mixture of equal parts vinegar and water.
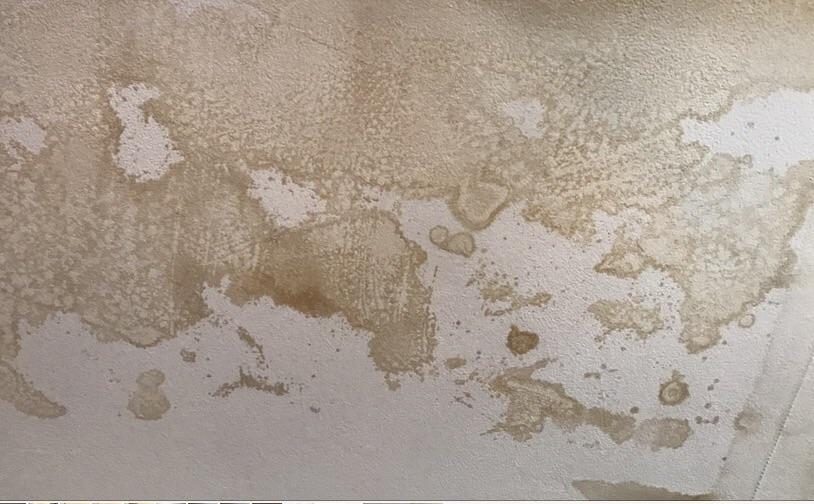
Create a homemade solution by mixing three cups of luke]warm water with one cup of bleach. Apply this mixture to the water-stained area using a sponge or cloth. This solution not only helps eliminate the water stain but also effectively removes any mildew, grease, dirt, or dust that can hinder paint or primer adhesion.
26. Unsticking drawers with wax
Over time, drawers can become sticky and difficult to open or close properly. And you may end up spending a lot on repairs. Whether they’re warping or getting stuck in their tracks, breathe new life into your furniture using unique methods.
Applying a small amount of wax or soap to the drawers’ runners can lubricate them effectively. This lubrication allows the drawers to glide smoothly, eliminating sticking or resistance. With this easy fix, your drawers will regain functionality, and you’ll have a seamless experience accessing your belongings.
27. Oil spills and cat litter
Dealing with oil spills in the garage can be challenging, especially when traditional cleaning methods worsen the situation. Fortunately, a surprising solution proves to be highly effective: cat litter! When faced with an oil spill, cat litter spreads generously over the affected area.

The litter quickly absorbs the oil, preventing it from spreading further and making cleanup much more manageable. Although removing every grain of litter once the spill is absorbed may take some effort, the result is a clean and oil-free floor!
28. Use pennies as shims
If you don’t have toilet shims readily available, don’t fret. Grab a penny or two and place them under the unstable foot of the toilet. Adjust the number of pennies as needed to achieve stability. To ensure a long-lasting fix, use a silicone gun to fasten the base of the toilet to the floor securely.
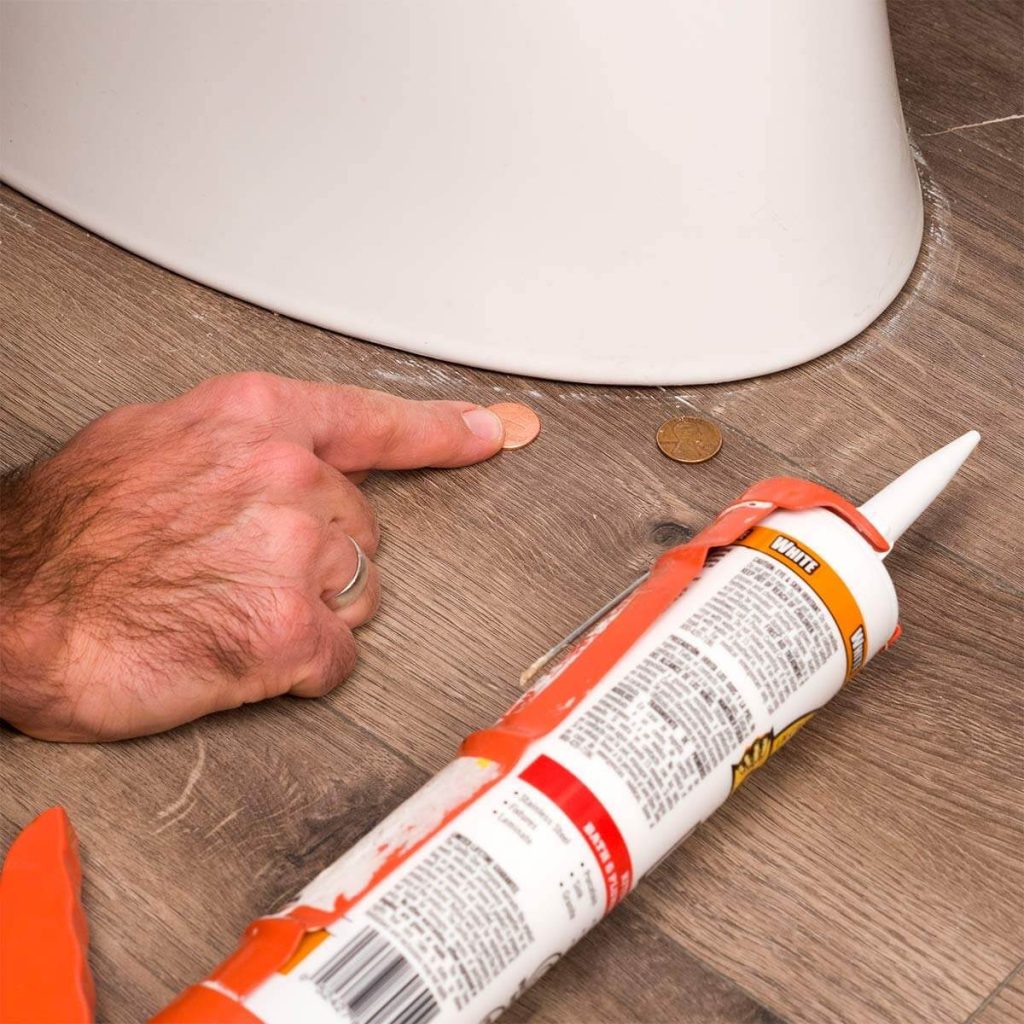
You can restore stability to your toilet without breaking the bank. Say goodbye to wobbling and enjoy a securely anchored fixture in your bathroom. This budget-friendly solution will have your toilet steady and secure in no time. Pennies can be surprisingly useful when it comes to shimming objects and filling small gaps.
29. Kool-aid unblocker
Kool-Aid isn’t just a refreshing beverage. It can also serve as an unexpected solution for stubborn toilet stains. The blog discovered the cost-effective alternative to expensive cleaners, “Anyone Can Decorate.” When traditional harsh chemicals failed to remove hard water stains in the toilet bowl, they turned to Kool-Aid.
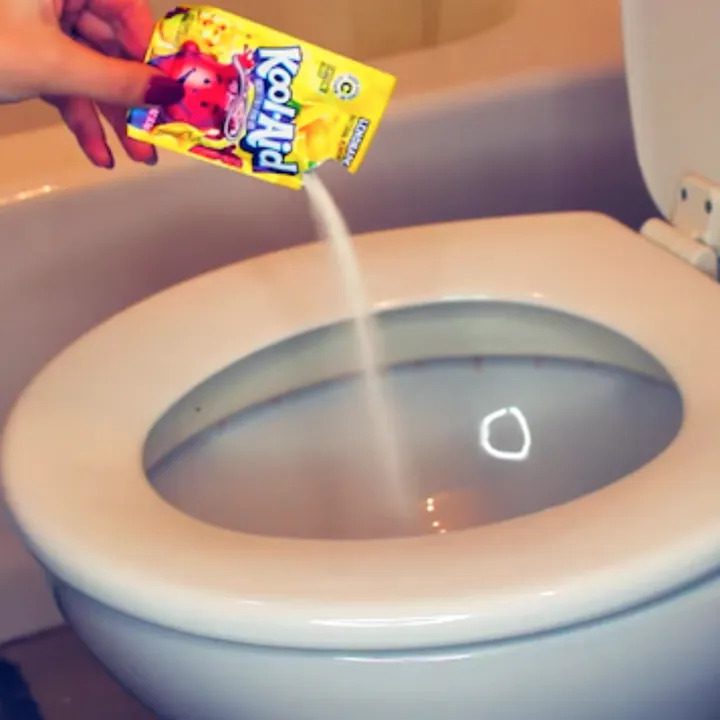
Imagine the surprise when they discovered that a packet of Kool-Aid could work wonders in banishing toilet stains and reviving a fresh scent! They successfully eliminated those stubborn stains by pouring this unexpected ingredient into the bowl and giving it a good scrub. This DIY hack proved effective and left behind a delightful aroma.
30. Using elastic bands and screws
We’ve all encountered those frustratingly stubborn screws during our DIY projects. No matter what we try, they just won’t budge. But fear not; an elastic band can be helpful in the right way. By placing an elastic band over the surface of the screw, you can provide extra grip and force to your screwdriver.
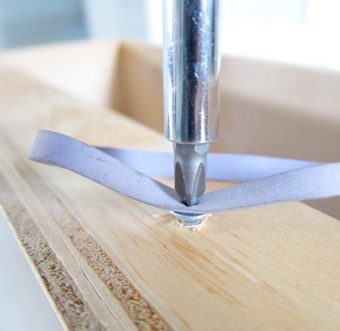
The band’s rubber helps create a stronger connection, allowing you to apply more pressure and eventually loosen the stubborn screw. This trick works wonders, especially with worn-down screws that have lost their grip. Try this DIY to save some time!
31. Fast flushing toilet
Do you need help with a slow-flushing toilet that requires multiple flushes? The culprit is often the water valve behind the toilet, responsible for regulating water flow into the tank. A malfunctioning valve can disrupt water pressure, resulting in inefficient flushing.
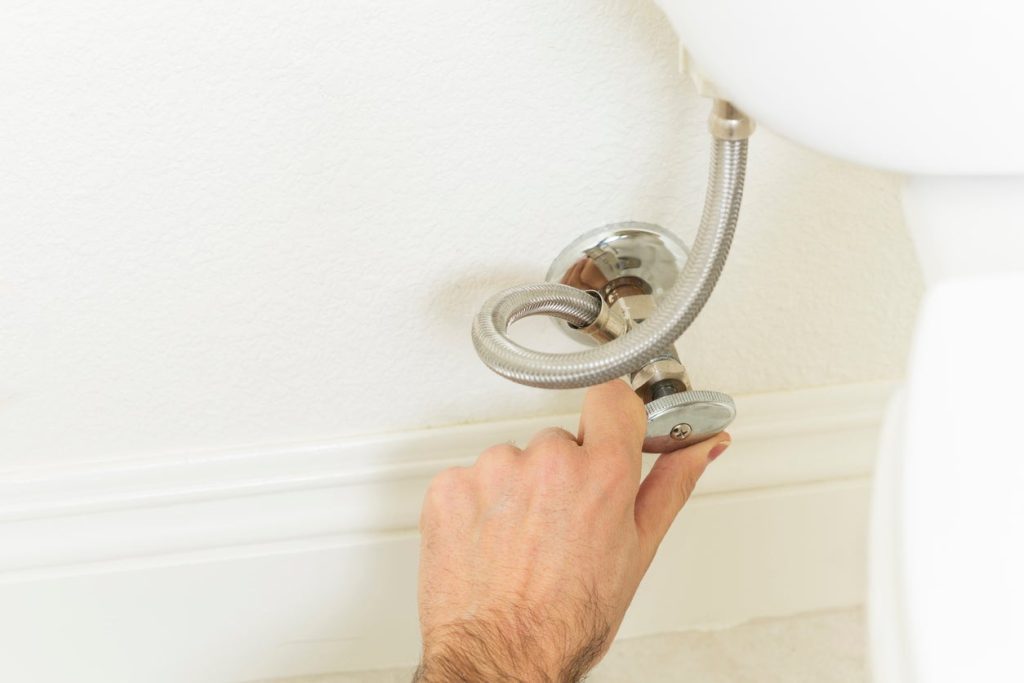
To fix this, locate the water valve and gently twist it counterclockwise until fully open. Sometimes, the valve may be partially closed, impeding water flow and leading to slow tank refilling. By ensuring the valve is completely open, you can restore the water pressure and once again relish in the swift flushing of your toilet.
32. Removing ice from windshield
Removing ice from a windshield is a common task during cold winter months, and there are several DIY methods to make the process easier. You can use an ice scraper or a plastic credit card to scrape the ice. If you don’t have any de-icer spray on hand, fret not! WD-40 can come to the rescue.
Before bed, grab a can of WD-40 and spray it on your windows and windshield. Use a dry and clean cloth to spread it evenly, creating a protective barrier that prevents snow and ice from sticking overnight. This solution will save a lot of effort, so try it!
33. Fixing scuffed skirting boards
Scuffed skirting boards can be a noticeable eyesore in any room. Maintaining new skirting boards is essential for preserving the overall appearance of your rooms. One effective method involves using touch-up paint. Start by creating a cleaning solution using detergent powder and water. Now, clean the area and ensure it dries thoroughly before proceeding.
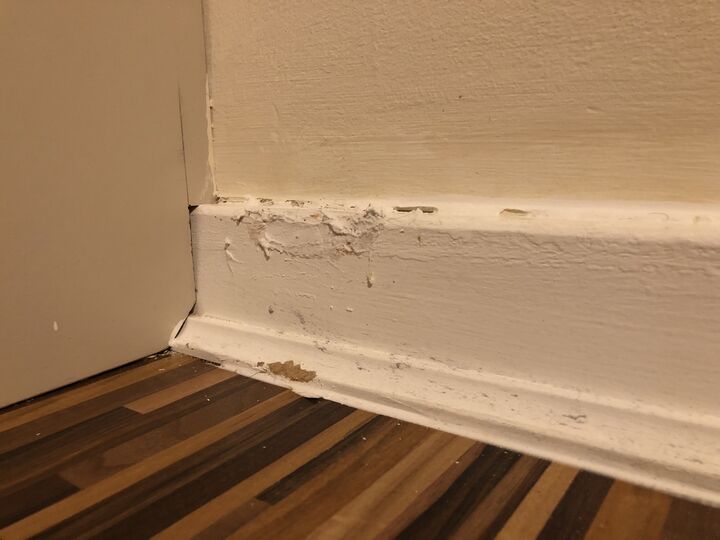
A handy solution is to utilize wood putty to address scuffs and fill in nail holes on your skirting boards. Begin by applying a small amount of wood putty to the affected areas, ensuring to blend it in seamlessly. The wood putty will create a wood-stained effect that seamlessly blends with the existing skirting boards.
34. Felt stickers on furniture
Protecting your floors and reducing noise in your kitchen or dining area is easy with felt stickers on furniture legs. These adhesive-backed felt pads are readily available in various sizes and shapes, making them suitable for furniture legs, chair bottoms, or other surfaces that come into contact with the floor.
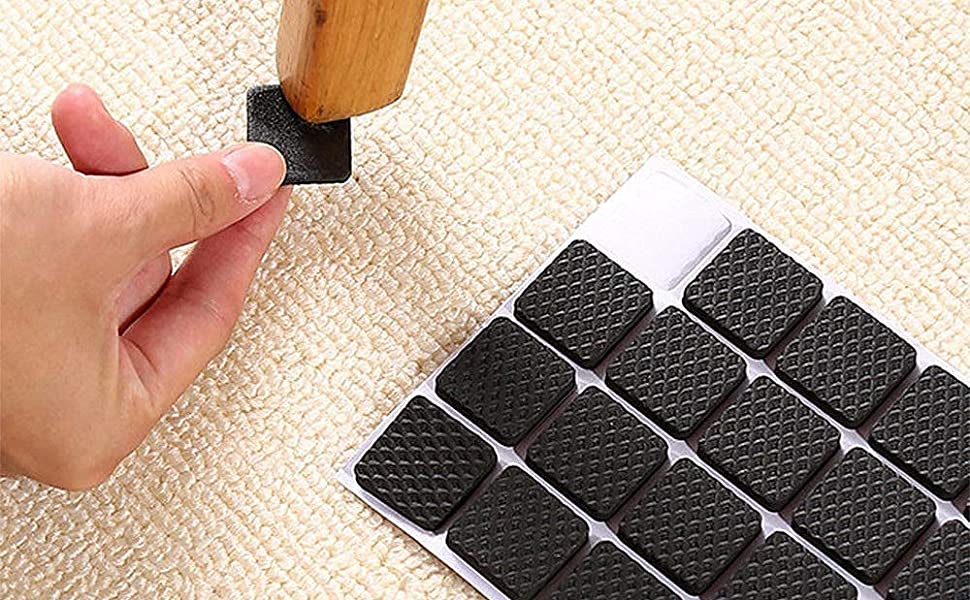
By affixing felt bottoms to the legs of your chairs, you can effectively safeguard your floors against unsightly scratches. Moreover, these felt stickers serve an additional purpose by minimizing the noise generated when chairs are moved, resulting in a quieter and more enjoyable dining experience.
35. Making a malleable plastic
Creating a malleable plastic substance for DIY projects can be helpful when you need a stronger adhesive than regular superglue. Although its exact science is unclear, a simple mixture of baking soda and superglue can transform it into a plastic-like form.
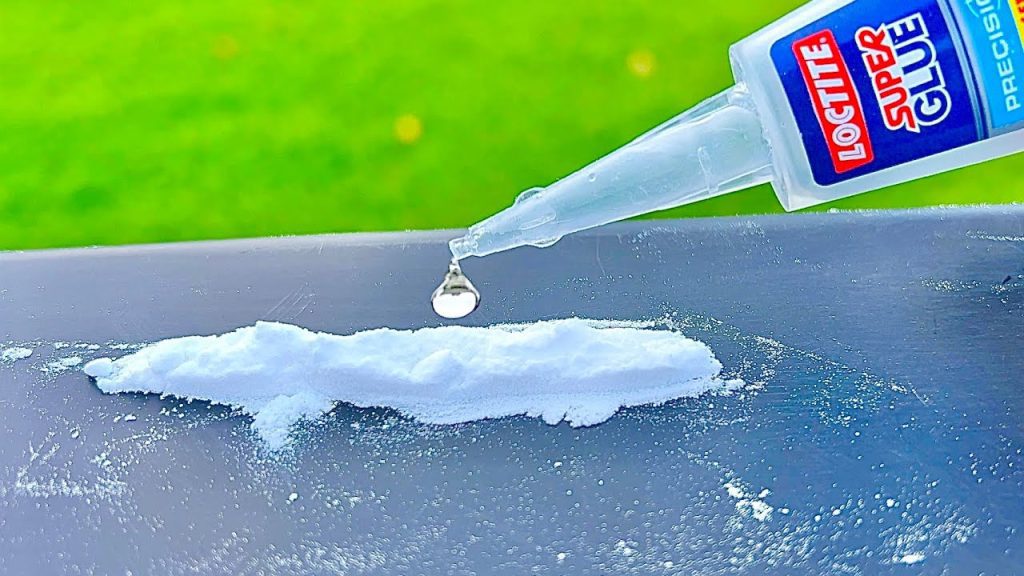
This unique combination is ideal for plugging holes and sealing gaps with enhanced durability. To use it, apply a small amount of superglue to the desired surface, sprinkle baking soda, and press down firmly with a cloth. The mixture will harden within seconds, providing a solid and reliable seal.
36. Lemon hard water cleaner
To begin, slice a fresh lemon in half and place the faucet at the lemon’s center. Encase the lemon and faucet in a small plastic bag, sealing it with a rubber band. Allow the natural citric acid from the lemon to work its wonders for a few hours.
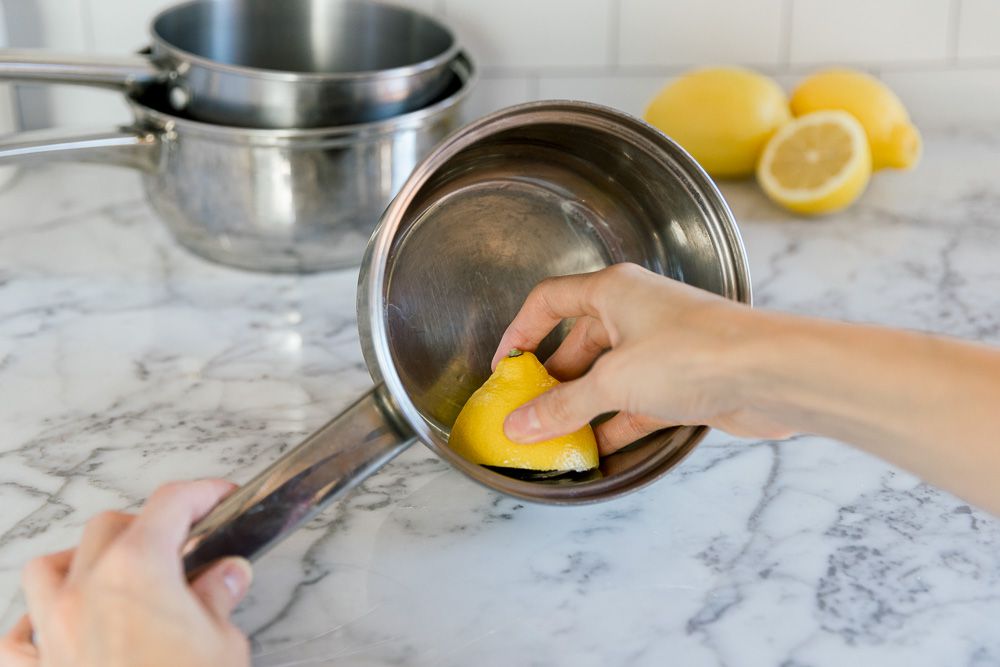
As you remove the bag, prepare to be amazed as the hard water build-up dissolves, leaving your fixtures looking impeccably clean and sparkling. Embrace the power of nature and bid farewell to persistent mineral deposits with this effortless lemon-powered solution.
37. Fixing dents in wooden floors
Restore the beauty of your wooden floors and furniture by efficiently fixing dents using a household iron and a damp cloth. Start by dampening the fabric and placing it directly over the dent. While it may not be the most exciting project, you’ll be amazed at how effortless it is to make those dents disappear.
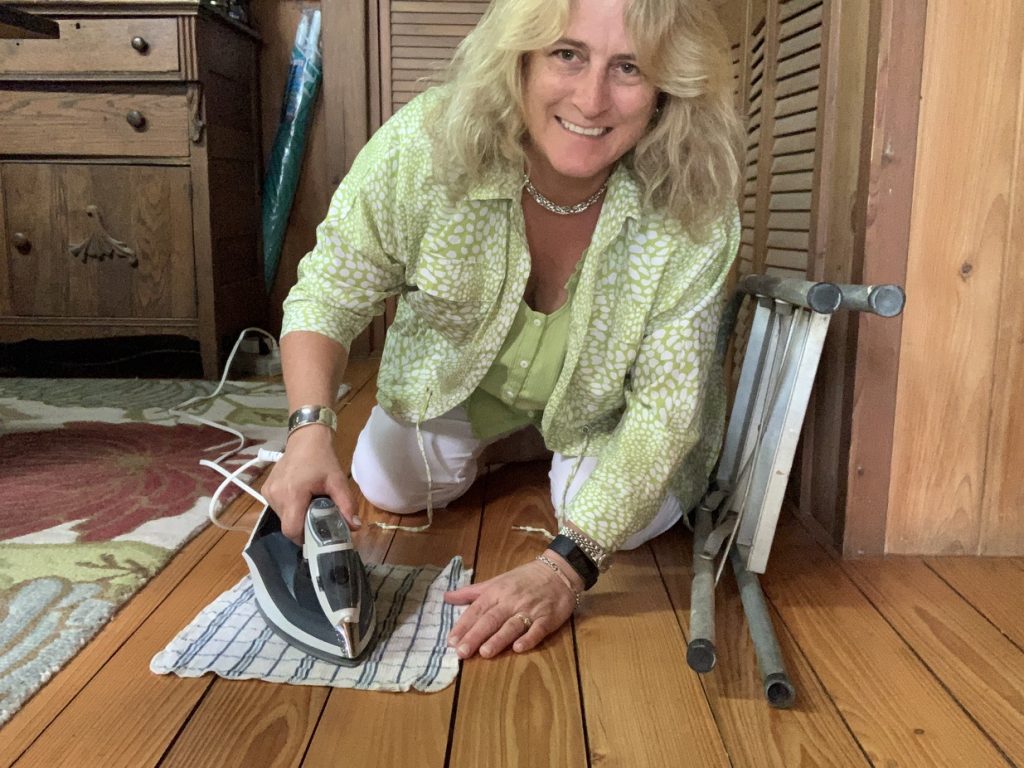
To fix minor dents, wet the dent, then cover it with a moist towel. Next, gently move the iron in circular motions over the towel. As if by magic, you’ll witness the dent gradually disappearing, leaving your wooden floor or furniture looking as good as new.
38. Command hooks for garbage
Command hooks offer a convenient adhesive solution for mounting on walls or cabinets, leaving no lasting damage to the surface. To utilize them for garbage, start by selecting a suitable location for the hook, such as inside a cabinet door or on the side of a trash bin. Clean the surface and let it dry.
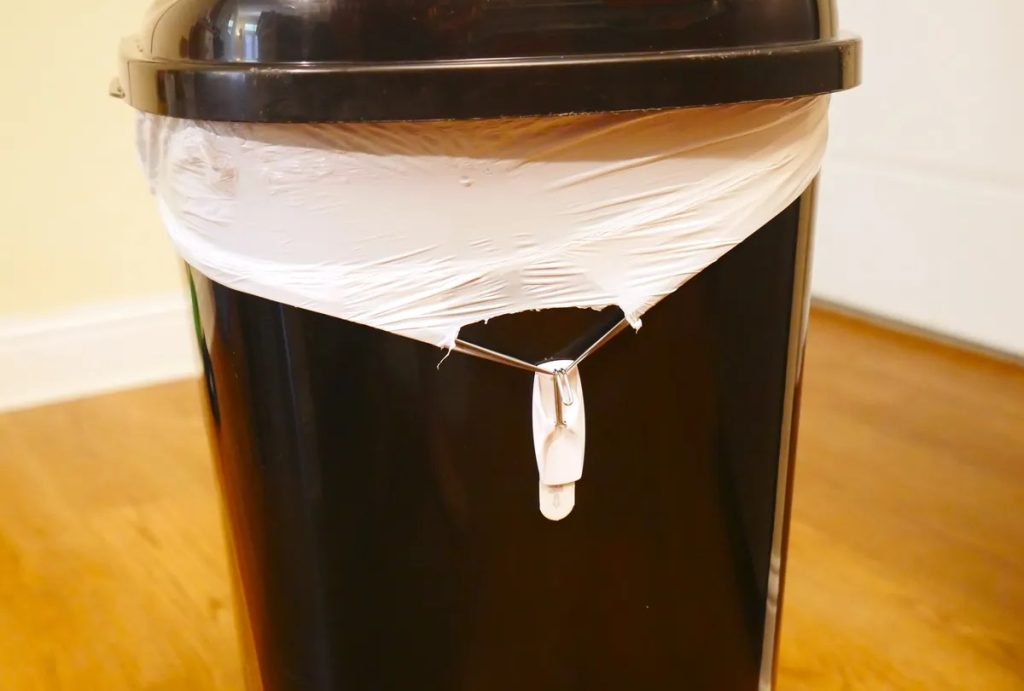
Once the hook is secured, simply hang the handles of your garbage bag on it, ensuring a snug fit. This method keeps your trash bags out of sight and prevents them from slipping or falling into the bin. Enjoy a more efficient and hassle-free garbage experience.
39. Aluminum foil and gloves
During the cold winter months, keeping your hands warm is essential for comfort and preventing discomfort caused by chilly temperatures. Instead of investing in touchscreen-friendly gloves that can be quite expensive, you can try this cost-effective hack using aluminum foil.
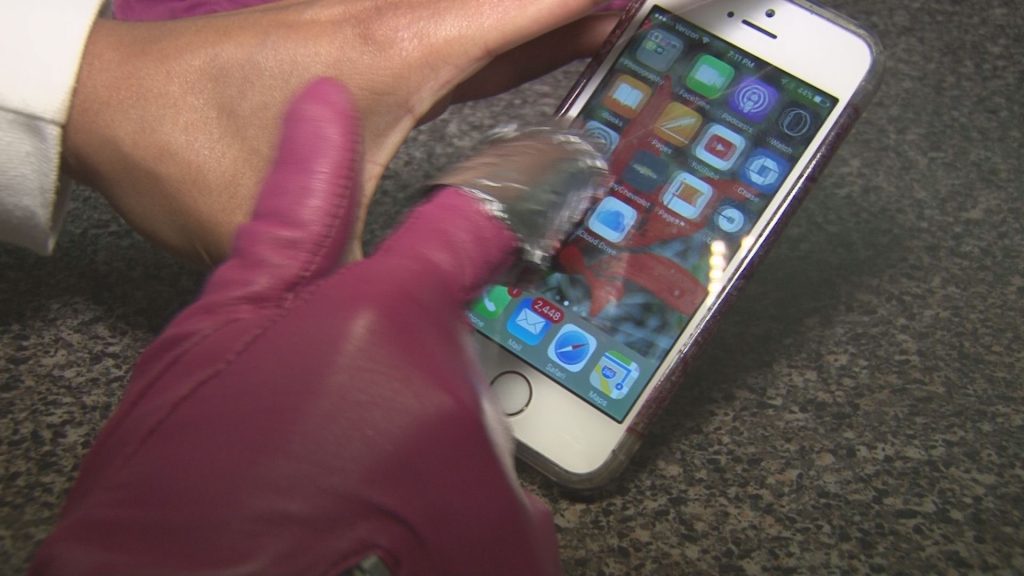
To keep your hands warm and maintain touchscreen functionality, wrap small pieces of aluminum foil around the fingertips you intend to use with your phone. The foil will act as a conductor, allowing you to navigate your device without exposing your hands to the chilly air.
40. Keeping your home warm
Begin by skillfully cutting the bubble wrap to match the dimensions of your window. Then, get your spray bottle and spritz some water onto the bubbly side of the wrap, creating an adhesive effect. Press the bubble wrap firmly against the window, ensuring it sticks. This insulation technique works like magic, skillfully trapping precious heat inside.
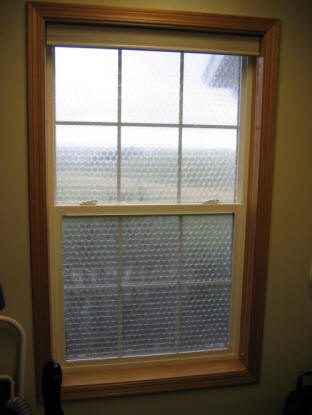
It’s important to note that bubble wrap insulation works best during winter when you want to retain warmth. During the summer, the sun’s heat can contribute to excessive heat build-up, making it less effective. This will keep your home cozy throughout the winter.
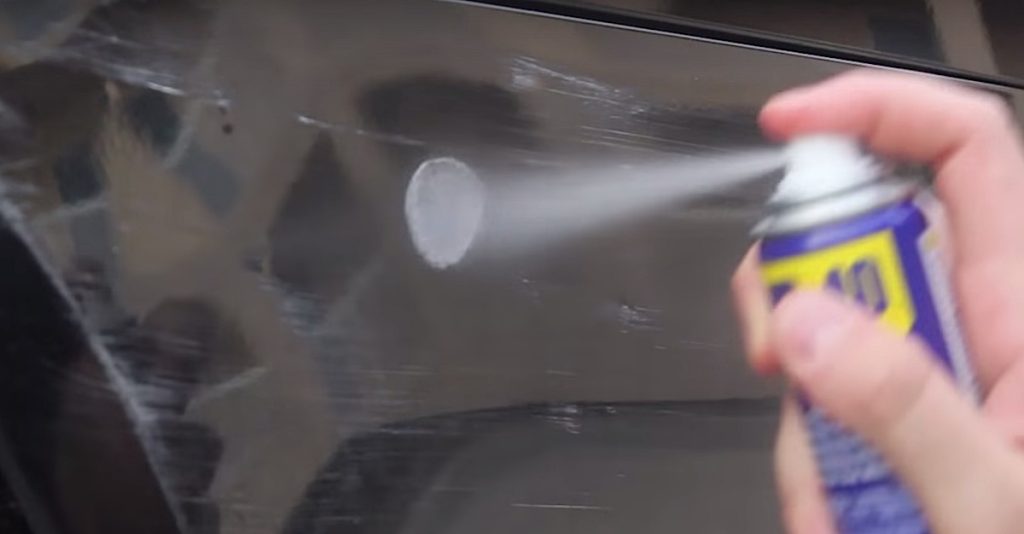
41. Toothpaste as scratch remover
Toothpaste isn’t just for keeping our pearly whites sparkling; it’s also a nifty scratch remover! Toothpaste can save the day, whether you’re faced with a pesky scratch on your phone screen, a glass surface, or even your car. Thanks to its slight grit, toothpaste works wonders at buffing out surface-level scratches.
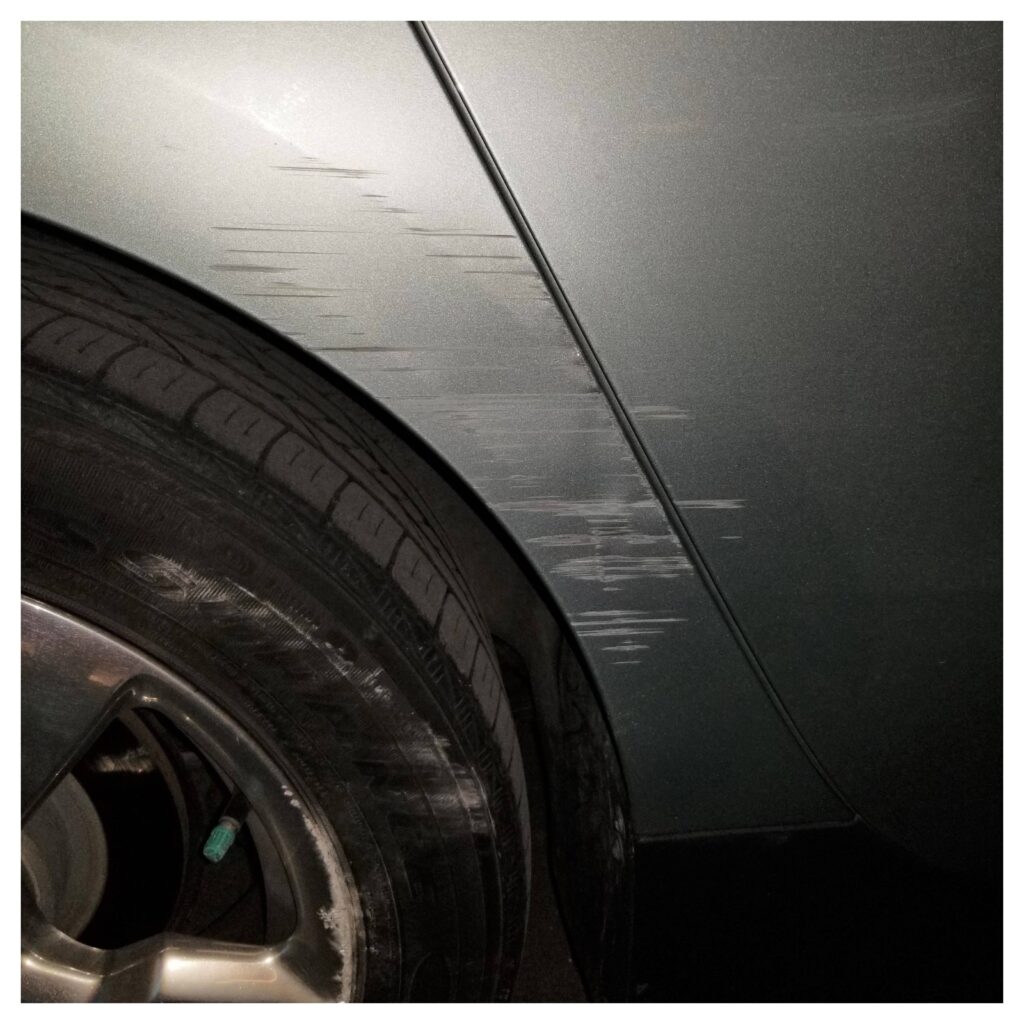
If you want to fix a paint scratch on your car, apply some toothpaste to a clean, dry rag and gently rub it using circular motions. With a bit of patience and elbow grease, you’ll be amazed at how toothpaste can help restore the appearance of those annoying scratches.
42. Magnets to keep cupboard doors shut
Say goodbye to pesky cupboard doors that refuse to stay shut with magnets. No need to call a repairer or embark on a costly kitchen renovation; all you need are some strong magnets. Attach these heavy-duty magnets to the cupboard door, and voila! Your cupboard will stay closed securely.
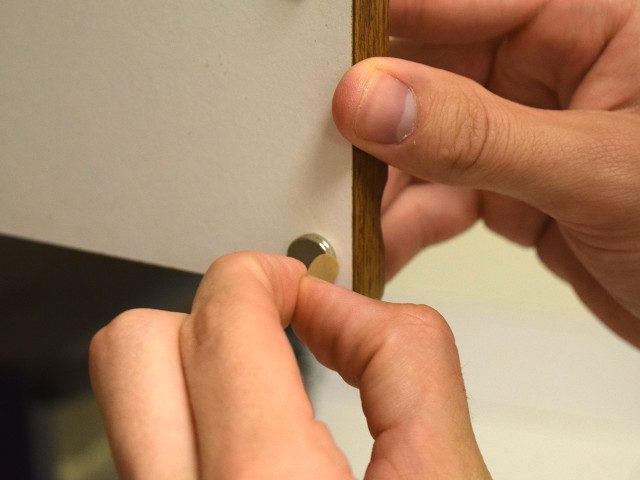
As a bonus, this solution also makes your kitchen cupboards baby-proof, providing an added layer of safety. Investing in these magnets is a practical solution for keeping your cupboard doors in check and a worthwhile investment for maintaining an organized and child-friendly kitchen.
43. Wallpaper air bubbles
After putting in all the hard work to apply wallpaper, it can be disheartening to find air bubbles spoiling the finished look. However, fret not! Fixing them is simpler than you might imagine, and you won’t have to redo the entire application. Begin by examining the bubble closely to identify any debris trapped inside.
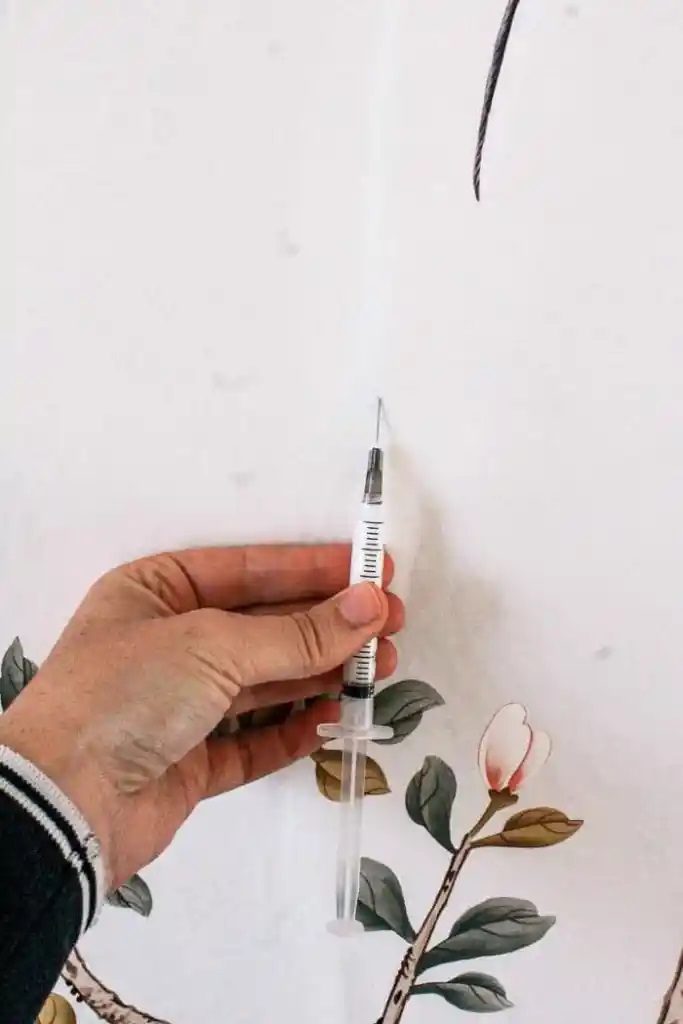
Make an “x” incision and apply adhesive behind it if you find any. However, if there’s no debris, you can quickly fix it with a syringe. Poke a small hole in the wallpaper using the syringe and inject adhesive. Your wallpaper will look flawless once again.
44. Rough plaster walls
Inspect the walls for any deep cracks or holes. Use a patching compound to fill these imperfections. Apply the compound using a knife, ensuring it is evenly spread and leveled with the wall surface. Disguising those rough surfaces is easier than you think. Simply grab some matte paint and apply it over the rough plaster.

The flat finish of the paint will help you to minimize the appearance of imperfections, giving your walls a smoother look. Be sure to choose a color that complements your space and enjoy the appealing looks of the polished surface.
45. Hard-to-open sliding door
If you’re experiencing difficulty opening your sliding door and want to spare yourself from frustration, fear not! The issue is often caused by debris buildup in the wheels and track. Following a few simple steps, you can swiftly eliminate the collected dust and restore smooth functionality to your sliding door.
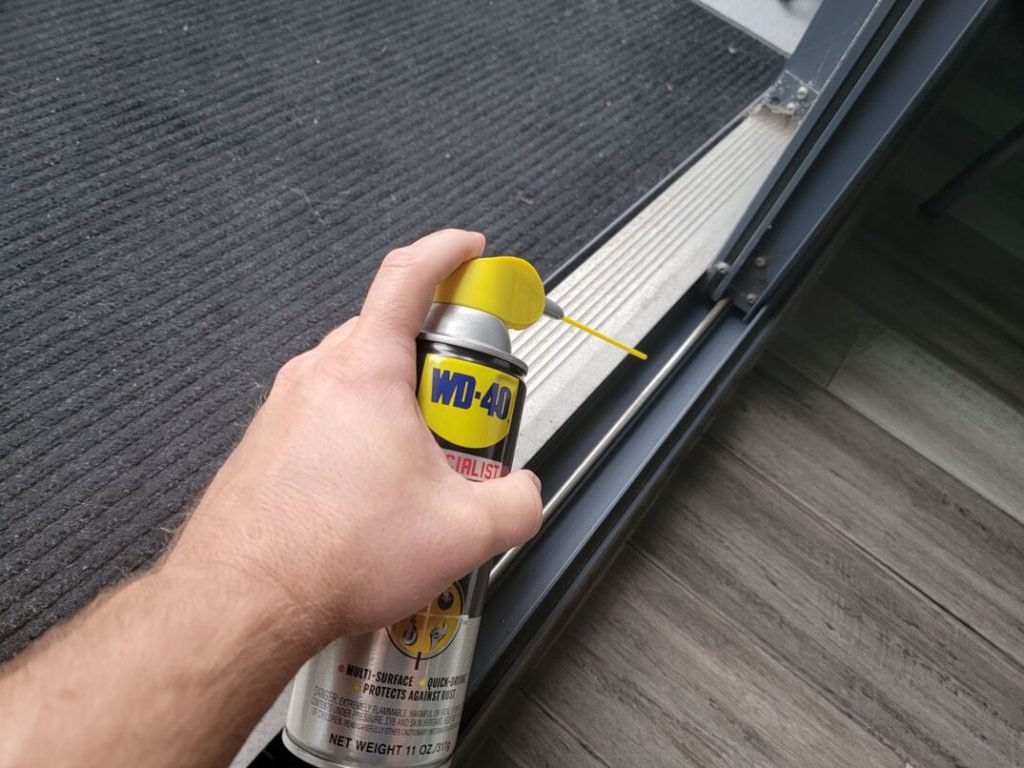
Start by loosening the screws at the bottom of the door and remove it. Take the time to thoroughly clean the wheels and track, ensuring all debris is removed. Once clean, apply a generous amount of silicone lubricant to the wheels and track. Finally, reattach the door and enjoy a smooth sliding motion.